Just starting out with your WordPress site? One of the first things you’ll want to learn is how to add an image to a WordPress post or page.
The process is exactly the same for both.
There are two phases to adding images to a post:
- Uploading the image to the Media Library
- Inserting the image into the post.
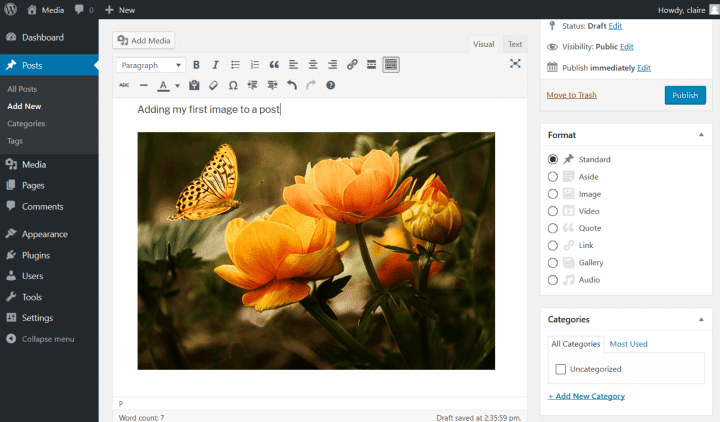
You begin by creating a new post and putting the cursor where you would like the image to go.
Not familiar with editing posts? Read this guide on the post editor.
How to add an image to a WordPress post step 1: Uploading an image
Upload an image method #1 – Add Media & drag and drop (easy)
When you’ve chosen where you want to add your image, press the Add Media button.
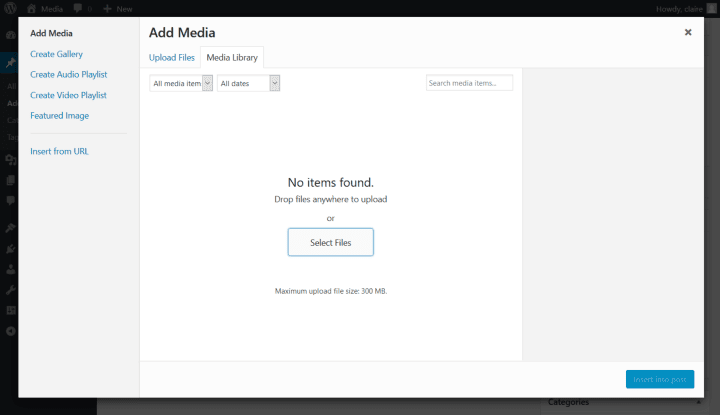
If you haven’t uploaded any images yet, WordPress will show you an empty Media Library. Let’s change that!
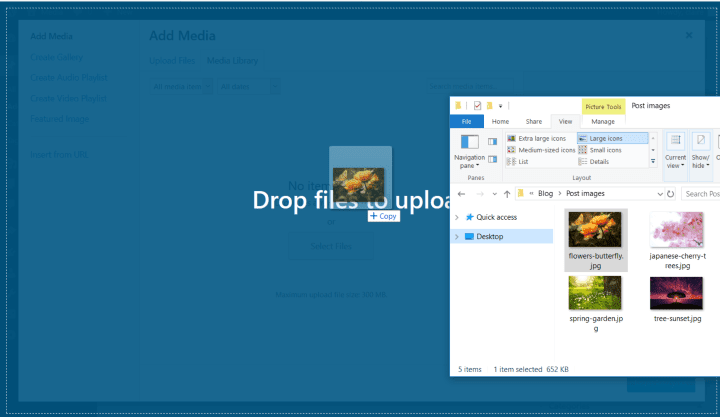
Drag and drop your image from the relevant folder on your computer into the upload area.
Wait for it to upload and you’ll see the uploaded image in your Media Library.
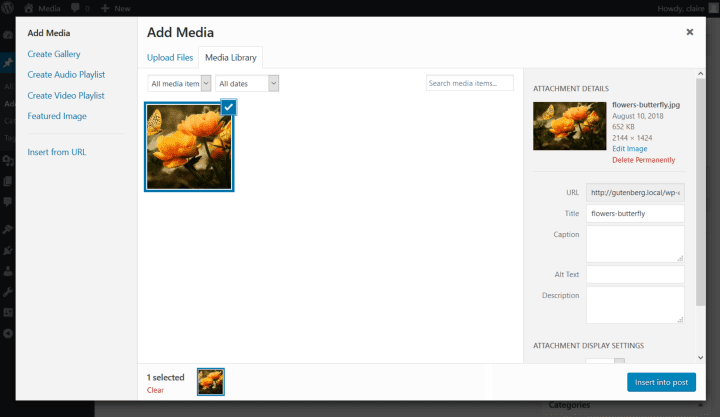
At this point, you could press the Insert into post button to add it into the post, but there’s a bit more work to do yet.
Let’s look first at the other upload methods.
Upload an image method #2 – Add Media and select (easy)
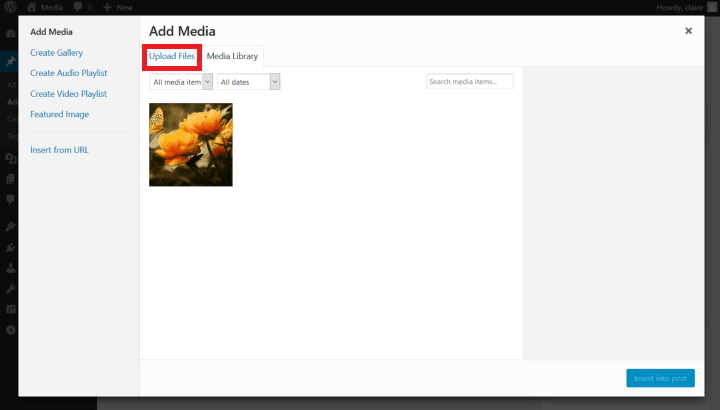
Press the Add Media button to insert an image where the cursor is.
If you have any images in the Media Library you will see that view first. Choose the Upload Files tab to upload a new image.
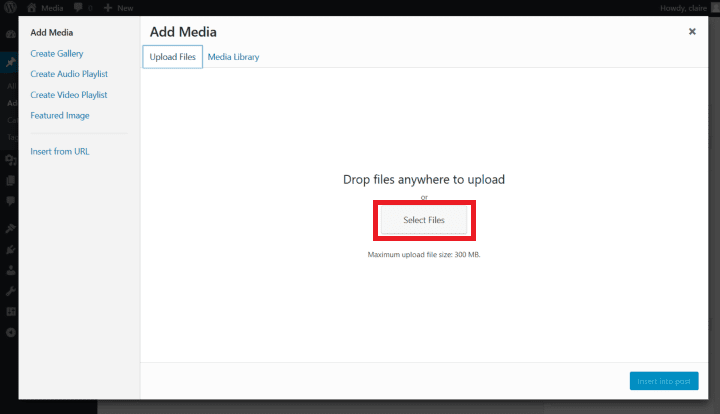
Click the Select Files button.
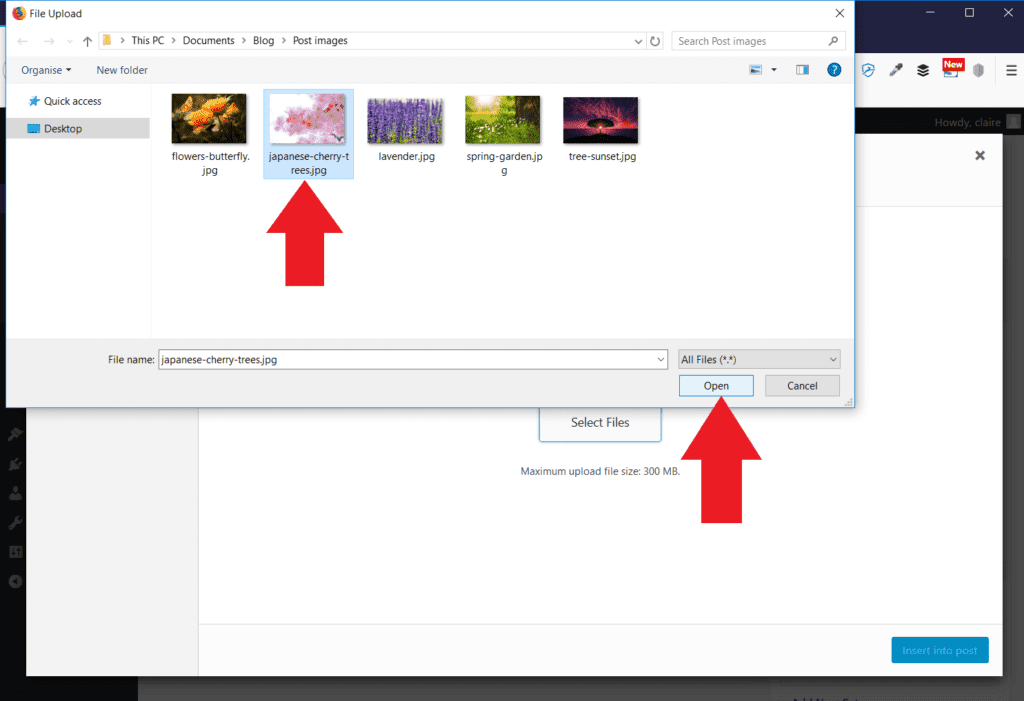
Navigate to the folder you want and select the image.
Click the Open button.
Your image will be uploaded to the Media Library.
Upload an image method #3 – Drag and drop (easiest)
Set your cursor in the editor where you want your image.
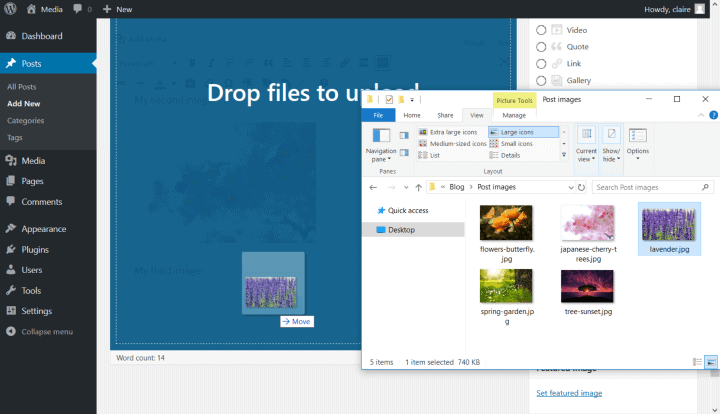
Drag and drop the image from an open window into the post editor.
Your image is uploaded and ready to insert. But wait, there’s more…
How to add an image to a WordPress post step 2: Inserting your image
You might have noticed several other options in the Add Media window when you uploaded an image. I’ll go through them one by one.
The Add Media window (Media Library tab)
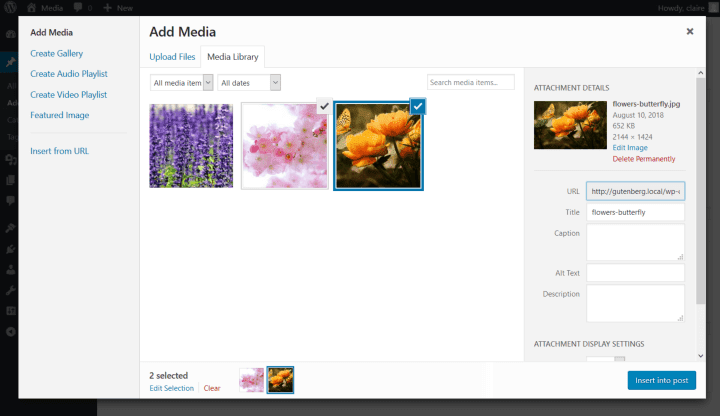
A blue border and tick indicate which image is currently selected.
You can select multiple images by holding down either the Shift or CTRL/CMD key and clicking on the ones you want. If you were to use the Insert into post button now, all your selections would be added.

The Clear link removes your selections.
You can, in fact, upload multiple images to add them to the Media Library and your posts.
But you must enter any additional customizations for them one by one. That’s done in the Attachment Details section.
Only one image (the one with the blue border and tick) can be seen in this section at one time.
Attachment details
This section of the Add Media window allows you to set things like an image caption, its size and what it links to.
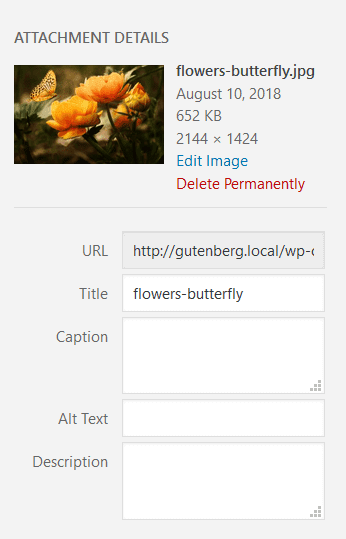
- image filename
- upload date
- file size
- file dimensions
Underneath all these are links to edit or delete the image.
Editing the image will take you to an edit screen. See my post on the Media Library for more about this.
The Delete Permanently link will nuke your image from your Media Library for good. You probably don’t want to use that yet!
Underneath these links are:
- URL of your image: you can’t change this.
- Title: this will normally take after your filename.
- Caption: Shows a visual caption under your image.
- Alt text: I highly recommend you complete this section. This describes your image for someone with a visual impairment. Find out more about why alt text is important.
- Description: Personally, I never use the description. It’s best used as a longer text description of an image e.g. a diagram. It is only seen on an attachment page.
Tip: while caption, alt text and description can be added later, setting them here will save them to the Media Library, meaning you can reuse them.
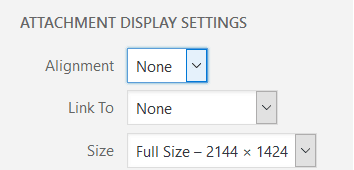
 Attachment display settings
You might have to scroll the window to see this section, but it’s super important! Do not miss these settings.
Alignment
This controls where the image goes in relation to text. There are 4 options:
- None: the image sits in a section of its own.
- Left: the image sits on the left and text flows round it to the right.
- Centre: the image sits in an area of its own, centre aligned.
- Right: the image sits on the right and text flows round the left hand side of it.
If you want to find out more about how this works, have a read of How To Solve WordPress Image Alignment And Text-Wrap Problems.
Link to
Want to link your image somewhere? Here’s where you control that.
Your choices are:
- None: no image link. This is what I use most commonly.
- Media File: your image links to the media file itself. It only makes sense to use this if you use a small image on a page and want someone to click through to a larger version.
- Attachment Page: links to the attachment page.
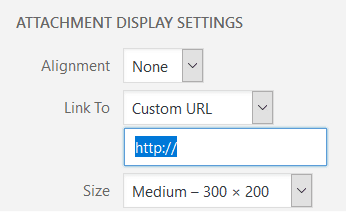
- Custom URL: link the image to any web page of your choice. You need to type or paste in the URL you want.
If you choose any kind of link, a box appears underneath the Link To dropdown.
If it’s a custom URL, complete it with the web page you want.
Otherwise, it will prepopulate with the link to the media file or attachment page.
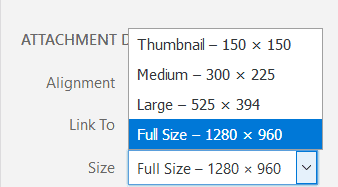
Size
Images aren’t a one size fits all! If you read my post on the Media Library for beginners you will have learned that WordPress creates different media sizes.
Unless you’ve uploaded a teeny tiny image you would normally have a range of sizes to choose from, namely:
- Thumbnail
- Medium
- Large
- Full Size.
Dimensions of the images vary depending on the original file dimensions and your Media settings.
Which size you go for will depend, but I advise choosing the size that’s closest to the display size you want.
Once you’re done…
Now you can use the Insert into post button. Your image will show up with the options you selected.
Changing things about images previously added to a post
WordPress remembers the attachment display settings you used when you last uploaded an image and will add the next one in the same way.
So if you chose to upload and add an image with no alignment, full size and not linked, guess what? The next image you upload will have those same attributes on insertion – unless you change them first.
But what happens if you want to change something about an image already in a post? Well, there’s a simple way to do that.
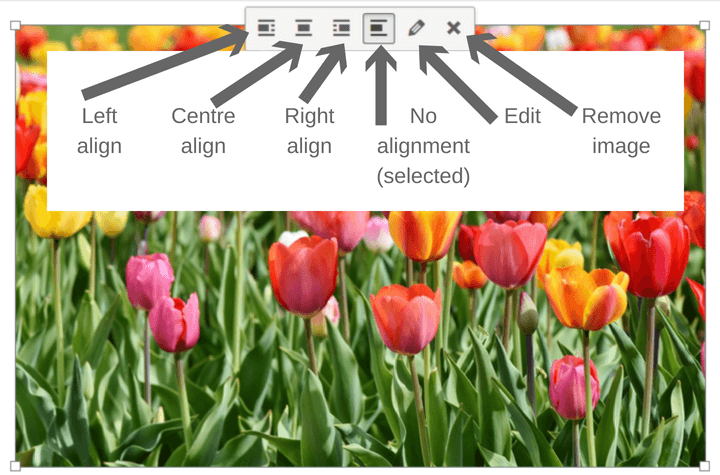
Click on the image and you’ll see a row of buttons at the top.
In order from left to right, they are:
- Align left
- Align center
- Align right
- No alignment
- Edit
- Remove
Use the alignment buttons to quickly change the position of the image in the post. Using the Remove button removes the image from the post, but not from the Media Library.
Image Details
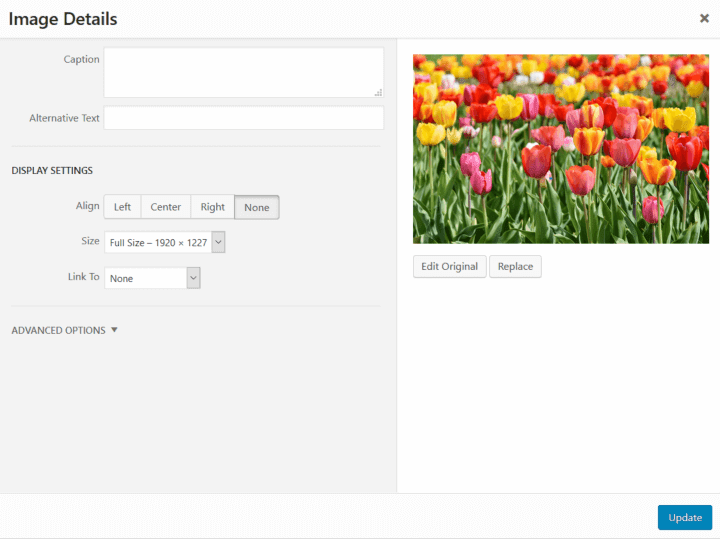
What does the Edit button do? It opens the Image Details window.
Here you can:
- Add a caption and alternative text (Note: unlike when you add these on upload, adding them here does not save them to the Media Library).
- Change the image alignment with the Align Left, Center, Right or None buttons.
- Change the image size using the dropdown. If you choose Custom Size you can enter a value for width or height – the other value fills automatically as the image proportions stay the same.
- Change what the image links to.
There are three other buttons:
- Edit Original – do some basic image editing which changes your original image. For more information on this see the section on cropping or resizing in my Media Library post.
- Replace – swap the image for another in the Media Library.
- Update – save your changes using this button.
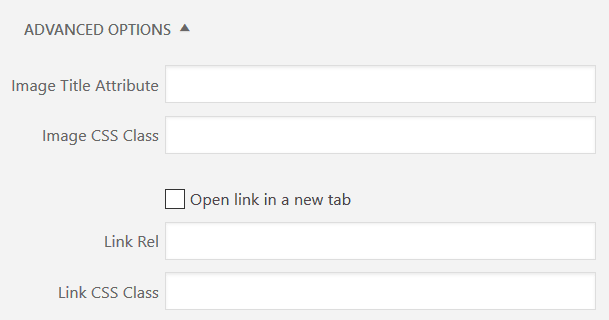
The Advanced Options section opens with a click. Here there are five settings.
I rarely use these, and you probably won’t need to either, except perhaps for option 3.
- Image Title Attribute: Text which pops up when you hover over an image with a mouse. Note that this won’t apply on mobile, and it’s not recommended for accessibility reasons.
- Image CSS Class: used by developers for styling images.
- Open link in a new tab: Tick this if you want to open a linked image in another tab. If it’s unchecked, the image link will open in the same window.
- Link Rel: adds extra attributes to image links. Don’t worry about it unless you’re a developer or SEO expert.
- Link CSS Class: used by developers for styling links.
Phew! Thanks for sticking with me. Remember to use the Update button when you’ve finished making your changes to save them.
What about image galleries?
Good question! I’ll write about galleries in a future post.
Anything else you need to know?
So now you know how to add an image to a WordPress post.
You might want to read over my post on optimizing your images before uploading them. This will help you to reduce the size of the photos or images you use, which means your site will load faster!
Any questions? Feel free to leave a comment.



 Attachment display settings

Thanks so much for this, Claire. It’s so helpful.
When there’s more than one way to do something I always wonder if a certain way is best and now I know.
Thanks for such wonderful and simple to read explanation.