
As Android phone user, Google Photos is my app of choice for photo storage. Sometimes I take a lot of photos at events, and I want to add them to blog posts.
Usually I resort to downloading the images to my laptop, editing them and uploading them to my blog.
It occurred to me the other day that it would save me time if I could add images straight from my Google Photos to WordPress.
After a spot of Googling I realised it was simpler than I initially imagined! Someone had already built the plugins needed to do the job.
So here are three plugins to add Google Photos to WordPress, all free to download from WordPress.org.
Which is best? They each have their pros and cons, so read on and find out!
1. Jetpack
Jetpack is the simplest plugin to set up.
How do you insert Google Photos with Jetpack?
First, check the following:
- you have the Jetpack plugin installed and active
- you have connected it to WordPress.com
(If you have a WordPress.com site, you can use the Google Photos integration and skip these steps, as your site already has Jetpack functionality.)
Next, you must be logged into WordPress.com to add Google Photos. The option is only available as part of the WordPress.com interface.
Navigate to My Sites in WordPress.com and select your site.
Under Site, select Posts or Pages and then Add New Post (or Add New Page).
If you are not using the Block Editor
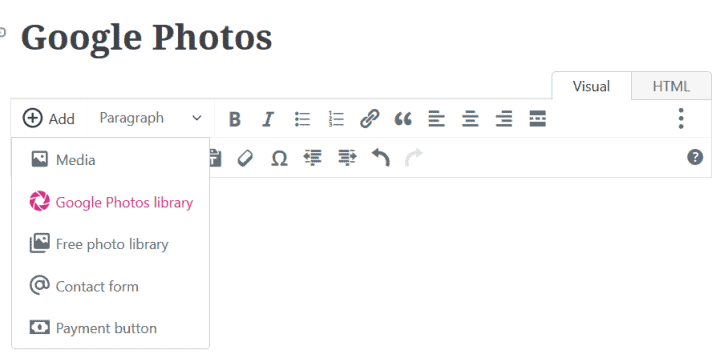
Click on Add and then Google Photos library.
When you do this for the first time, you’ll be asked to authorise the connection to Google Photos. Choose your Google account and select Allow when prompted.
You should then see your Google Photos appear in date order from newest to oldest. Use the slider control to change the size of the thumbnails when viewing.
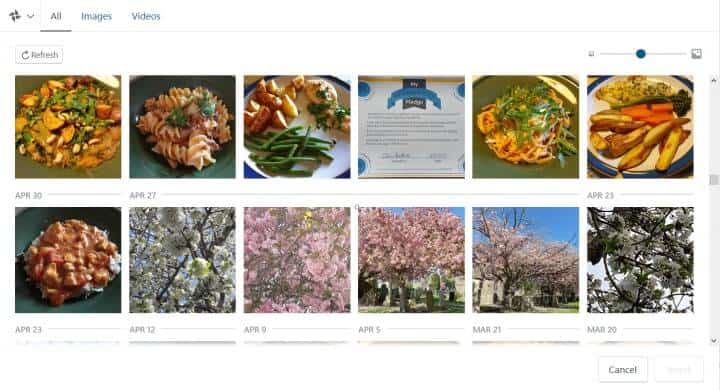
If you want just one image to go in the post, click Insert after making your choice.
For multiple images, select the images you want and then Copy to Media Library. If you want the same images in the post as well, choose Continue. Multiple images will be added as a Gallery.
If you are using the Block Editor
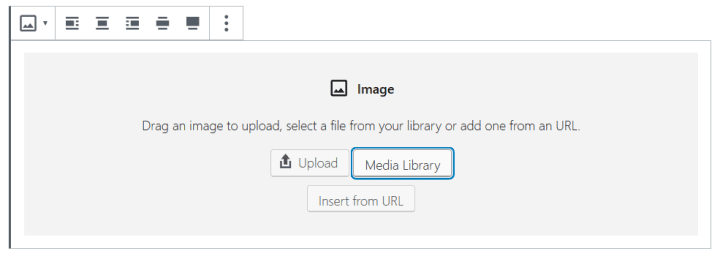
In a new post or page, add an Image block or a Gallery block.
Click the Media Library button in the block.
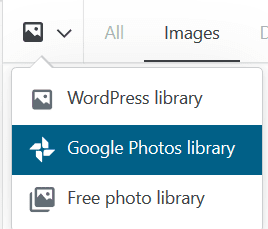
Click on the arrow in the top left next to the image icon “Choose Media Library source”. Select Google Photos library.
Make the connection to your Google account, if you’re doing this for the first time.
Select one image if you’re using the Image block, or multiple if you are using the Gallery block. Images add automatically to the block. You can change their size, orientation etc. after this.
Revoking access to Google Photos
If you want to revoke access to Google Photos you can disconnect it by going to WordPress.com’s Sharing settings. Select your site and then click the Disconnect button next to Google Photos.
This will halt any further access to Google Photos. Any previously downloaded photos in your Media Library will remain.
If you change your mind, you can reconnect.
Pros of Jetpack’s Google Photos integration
- Saves time if you want to add a batch of photos quickly.
- No plugin settings to configure or API keys to get.
- You can select individually the images you want.
- Copies images to your Media Library, so you can edit them.
- Once you’ve connected Google Photos, you can add your photos across all your sites connected to WordPress.com.
Cons of Jetpack’s Google Photos integration
- Full size photos can be large (mine were 4MB in size) so you don’t want to get in the habit of adding them to posts, as they will slow down the page load. (Smaller image sizes are less weighty.) For a faster site, you might want to use an image compression plugin, or use Jetpack’s Site Accelerator feature.
- Images keep their default filenames e.g.
20190628_154220.jpg. While you can use a plugin to rename them later to make them more SEO-friendly, it’s fiddly. - There’s no way to add albums.
- You can’t filter photos by date before adding them – scrolling is required!
- For self-hosted WordPress, Jetpack is a Swiss army knife of a plugin. If you’re only using this one feature, it might not be worth installing.
2. Google Photos Gallery with Shortcodes
To use Google Photos Gallery with Shortcodes you’ll need to get API keys and authenticate with your Google account. This is a little tricky to do, but fortunately you only have to do it once.
This plugin works via shortcodes. You enter the shortcodes in the post editor if you’re using the Classic Editor, or in the Shortcode block if you are using the Block Editor.
Unless you want to show all your Google Photos, you need a pair of shortcodes on two separate posts or pages.
This shortcode shows your own albums in a grid.
[cws_gpp_albums_gphotos access=own theme='grid' results_page='results']
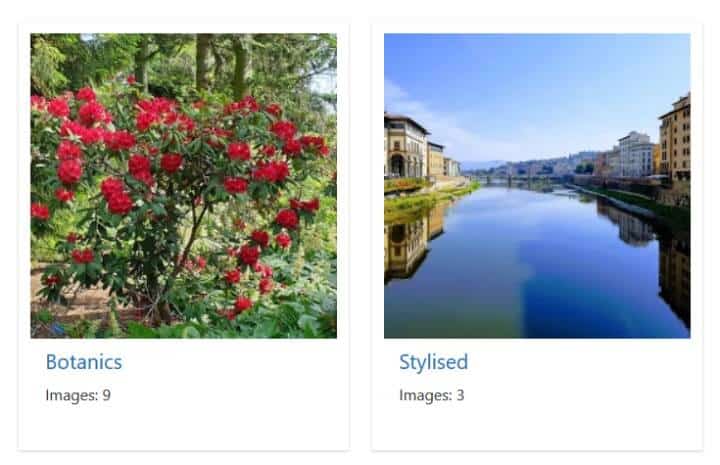
In your results page, you enter a shortcode like this:
[cws_gpp_images_in_album_gphotos theme='carousel']
This will show the images in the album previously selected in a carousel.
In this example the filename shows in the photos. You can hide this by adding show_title=0 to the shortcode.
Pros of Google Photos Gallery with Shortcodes
- Display albums and photos in a grid, list or carousel.
- Hide albums via the
hide_albumsshortcode attribute. - Show and hide the album titles and details i.e. filename and description.
- You can overlay the album title on the thumbnail image.
- There is a built-in lightbox.
- The photos are not saved in your Media Library – they’re served from Google. This saves you space, though it means you can’t manipulate them directly within WordPress.
Cons of Google Photos Gallery with Shortcodes
- The shortcodes are tricky to use. The other plugins are definitely more user friendly.
- No way to select individual images. You have put your photos in albums first.
- Images show as within Google Photos: if you want to edit them, you need to do it there first.
- No date or content filtering available. You either show all your photos or specific albums.
- The grid view was buggy for me. With 7 albums, I had three show on one page, two on another and two on a third, with a Next link after each. I was expecting them to show all on the one page, or at the most two.
- The carousel moves by itself. You can pause it with the mouse, but there are no keyboard controls to do so.
- Some of the cooler options are only in the Pro version e.g. showing images from one specific album or download links.
- If you deactivate the plugin, you have to reauthenticate with Google if you subsequently reactivate it.
- A major flaw with this plugin is that if you access a ‘results’ page URL directly i.e. without clicking through from an album first, your entire photo stream shows, newest images first. This is bad if you want to keep some images private! For me that’s a deal breaker for using this plugin.
3. Photonic Gallery & Lightbox for Flickr, SmugMug, Google Photos, Zenfolio and Instagram
Photonic doesn’t just cover Google Photos – it allows you to add images from a range of services.
Like the previous plugin, you’ll need to create API keys and authenticate with your Gooogle account in order to use it.
Once you do, you are ready to add a gallery.
As with the previous plugin, the photos are not added to your Media Library.
If you are not using the Block Editor
- Click the Add/Edit Photonic Gallery button above the post editor.
- Select Google Photos as the source.
- Select Multiple Photos, Photos from an Album or Multiple Albums.
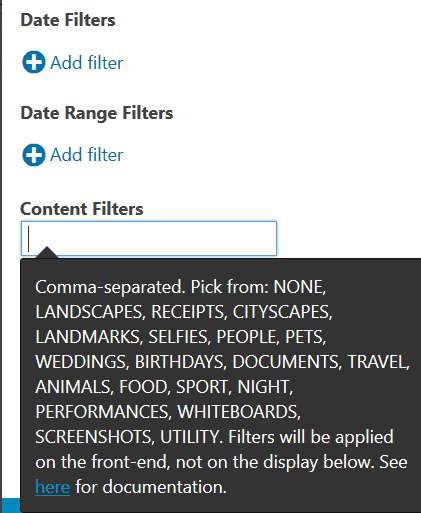
- Filter the content if you want.
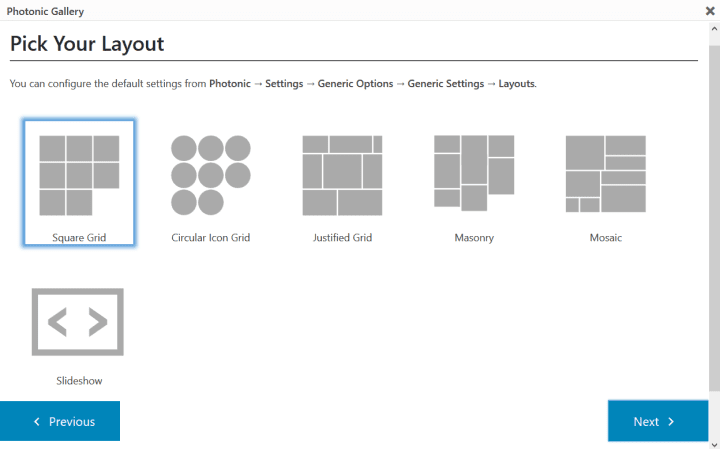
Photonic date and content filtering - Choose a gallery layout.
Photonic gallery layouts – square grid, circular grid, justified grid, masonry, mosaic and slideshow - Edit your gallery. For example, you may want to limit the size of the photos displayed in the lightbox.
- Use the Insert Gallery button to insert your gallery.
- Save the post and view it to see the gallery.
If you are using the Block Editor
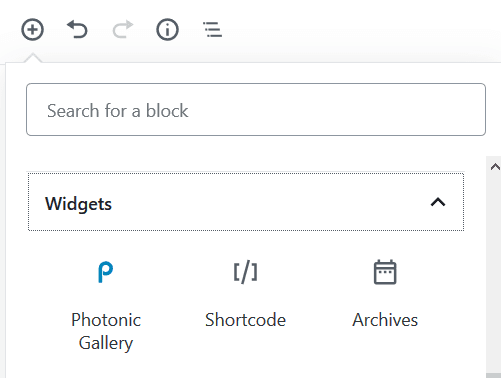
- Add the Photonic Gallery block from the Widgets section.
- Click on Add Photonic Gallery in the block.
- Follow the steps in the previous section.
Pros of Photonic
- Works with multiple photo sharing services, not just Google Photos.
- 94 five star reviews on WordPress.org, and good support (48/55 issues resolved in the last two months).
- 6 gallery types to choose from.
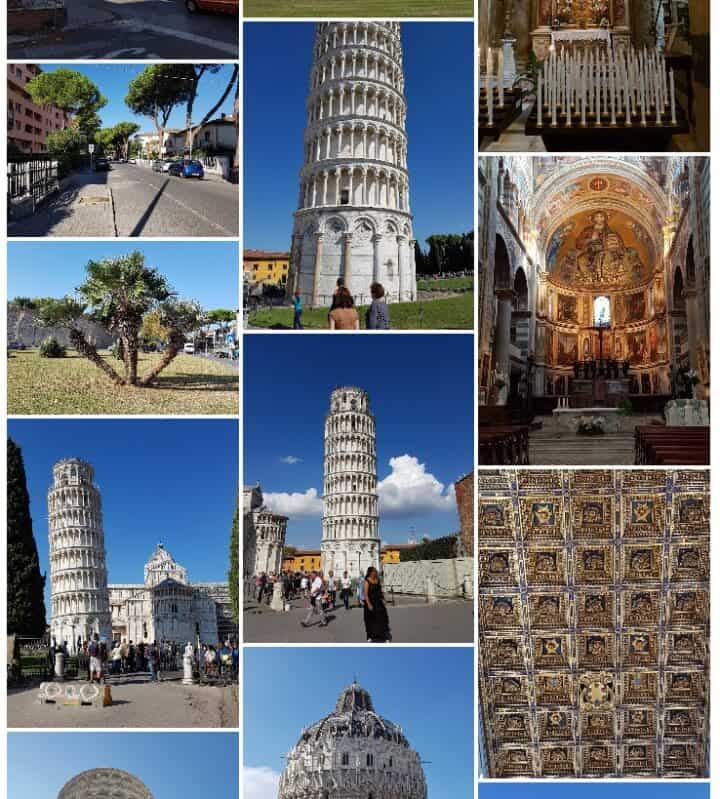
Masonry layout in Photonic of photos taken in Pisa - Supports the Block Editor – there is a Photonic block.
- Date and Date Range filters. Handy if you want to show all photos from a specific event.
- Content filters using Google-defined categories. For example, these are photos tagged as food.
A circular grid of Google Photos tagged Food - Supports various lightboxes.
- You can enable social sharing in the lightbox.
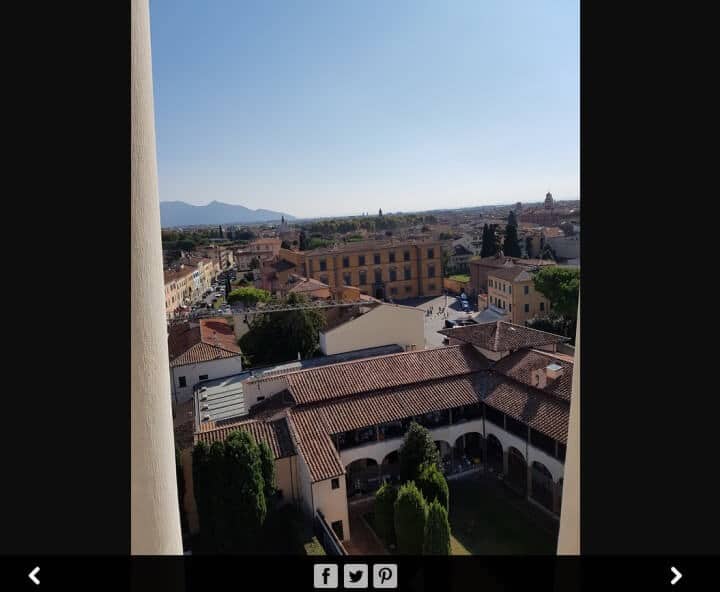
Swipebox lightbox of Piazza dei Miracoli, Pisa, showing sharing icons - The feature set rivals premium plugins, and yet it’s free.
Cons of Photonic
- This was the hardest of the three plugins to set up – I found it took me about 20 minutes to get the required API keys and authentication. Fortunately it’s a one-time step.
- Images show as-is. If you want to crop them first, for example, you would need to do that in Google Photos first.
- Lots of settings; it may take you time to get the most out of the plugin.
- You can’t select images individually to show. If you want specific ones, you have to add them to an album first. I couldn’t see a way to exclude items from a filtered group either.
- Photonic may require extra setup to work with Gutenberg to avoid breakages.
- As the Galleries load from Google, they may take a few seconds to show when the page is loaded. I found this a problem when trying to add two galleries to the one post.
Verdict
For me it’s between Jetpack and Photonic. Which one you pick will depend on what you want to do.
Jetpack wins if you want specific images to go in your Media Library, and don’t mind spending a bit of time selecting and editing them.
Photonic wins if you want beautiful layouts and the filtering of photos, and don’t want to manipulate individual images.
Have you tried any of these plugins, and what did you think? Let me know in the comments below.






Hello Claire
I am the author of Google Photos Gallery with Shortcodes plugin.
Thank you for taking the time to note your thoughts and feature the plugin in your blog.
Just wanted to let you know that the ‘deal breaker’ bug has been resolved! Thanks so much for highlighting that.
Thanks Ian – that’s really good to hear. I’ll update the post.
Thanks for covering Photonic (I am the author).
I wanted to cover a couple of points that you have brought up:
This has never been the case with Photonic. You can pick any size you want, and you can choose to crop the images directly via Photonic, if you wish. In fact, if you select the “Square Thumbnails” layout, an option shows up letting you crop the thumbnail that you are showing.
Actually, rather than being a “con”, this is something that is touted as a strength of Photonic by users. Essentially, Photonic is 7 years older than Gutenberg, and many users have used the plugin in its default configuration, i.e. with the
galleryshortcode. To help people transition to Gutenberg, I built a full-fledged shortcode “search and replace” utility, completely bundled within the plugin. To date not a single user has faced any issue with Gutenberg interoperability.One more point to follow-up: the reason the setup of the API keys for Photonic is difficult is mainly due to Big G’s terms of service.
Plugins such as JetPack focus on “Copy to Media Library”. Effectively this takes a photo from Google and copies it locally on your WP server. Any changes you make on Google will not show up on your photo in your website.
However, Photonic consciously eschews this paradigm. It instead pulls your data live from Google Photos when your page is viewed. This way, if you have added new photos to an album, or have tagged new photos with the same tag, or you have changed dimensions / descriptions of a photo, all of those get covered without your having to change anything on your page itself.
This serves two purposes: local storage space is not sacrificed, and your content is always displayed fresh.
This distinction is important because it is the sole reason I cannot bundle my API key (and save each person 20+ minutes).
A default Google API key by default caps the number of API calls at 10,000 per day. Based on the number of users Photonic has, if I had bundled my key users wouldn’t have to get their own, but they would hit the daily limit within an the first 4-6 hours each day … and that would lock out all Photonic users for the rest of the day!
The way around this is to apply for the Google Partner Program, which I did. Being a Google Partner significantly raised the API key limit to at least 500,000 requests per day. Unfortunately, after I finished all steps in the application process, Google said that to be considered a partner, I couldn’t pull photos live from Google – I instead had to copy the photos over locally. Considering that I had already written and bundled the code into Photonic for this (I had to show them a working demo), it was a major setback (the code is still present in the plugin).
Unfortunately Google is the only provider that has a litany of restrictions that cause such challenges:
– Their API is such that you cannot cache results, which triggers a bloated number of API calls per day.
– To compound it all, the process to get a Google API key and to authenticate is protracted and undocumented. What I put in place for Photonic is probably the most comprehensive documentation available for getting Google’s API keys.
– Ironically for a search engine, Google’s API doesn’t let you search by name etc. This is another item that causes difficulty with easily filtering photos.
By contrast:
– Flickr has limits on how many requests can be made with an API key, but it is quite easy to get an API key for it. Its API is the oldest of the lot and quite comprehensive; apart from collections they handle everything pretty well.
– SmugMug is the best of the bunch when it comes to API keys. The key is easy to get, and for the past several years they have had no restrictions to how many calls you can make. So I bundle my own key with the plugin for unauthenticated calls, and let users define their own key for authenticated ones. With this approach more than 99% of SmugMug users don’t need to create an API key. SmugMug rewrote their API in late 2016 and their new API is a lot more streamlined and is the most advanced of all the providers, requiring the least number of calls.
– Zenfolio goes a step beyond SmugMug and doesn’t even do API keys! Its API has some limitations with respect to user-based searches though.
So, all in all, to keep the ability to pull data on the fly from Google and not create local copies, I have to make users take on the 20+ minutes of pain. I have tried my hardest to make the documentation good, but users such as your good self are the best judge of that.
I trust that if you were to use the other sources for photos you wouldn’t face anywhere near the same amount of trouble for authentication.
BTW, I really appreciate you covering Photonic so well, with all the screenshots!
Many thanks, Sayontan for these detailed comments. I wish I had had more time to test Photonic in-depth so that I had discovered its editing capabilities. Good to know that the switch to Gutenberg is a smooth one too.
I appreciate the amount of time and hard work you’ve put into the plugin. I think your good reviews and feedback are a testament to that.
I agree about Google’s API requirements, they are a pain. I remember when the Google Maps API changed last year and it became quite a tricky multi-step process to get a key and set up a billing account. (I remember documenting it at the time – very tedious.) I totally understand that you can’t take on that responsibility for all your users.
I’m pleased to hear that the other services Photonic supports are a lot easier to set up!
Thanks for writing an article listing these options. I don’t see “Google Photos” as a drop down option when I click on “Media”. Our WordPress site is built with Divi Builder. Could that be the reason? Do you know if there’s a way to connect Google Photos to a Divi built WordPress website?
Tnx for the great explanation. Neither solves my problem with my client, unfortunately. It is a small fashion shop, were staff take pictures on mobile phoone, which eventually end up in google photos. All products need fresh photos. We used a plugin to connect to google drive, but images from mobile phone doesn’t go directly to drive anymore. I cant ask staff to acces the jetpack via wordpress.com, as they strugle enough with other services and logins – they are shop assistants selling fashion.
What I need is the Jetpack solution without the wordpress.com login. Even though woo, wordpress and jetpack is all automaticc products, the added meta fields doesnt show properly in wordpress.com.
I’ll follow your blog and get back when I find a great solution.
Thanks again for your efforts.
Excellent article ! It was really useful for me to find Photonic, what is a real treasure! Excellent stuff and very useful.
True, it takes time to set up the API with Google. However, it is useful to do so. The gallery displayed is beautiful and is in real time, always reflecting the latest modifications I made at Google Photos.
Sayontan! I highly appreciate your detailed note here!
And thanks for the wonderful plug-in.
Friendly greetings from Hungary
Tamás