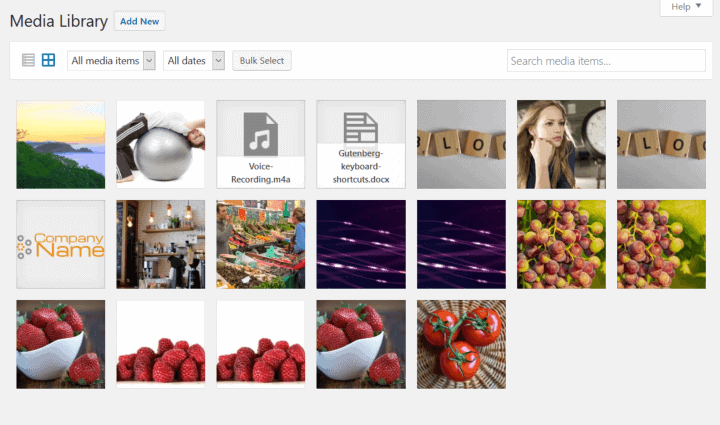
The WordPress Media Library is the home for any files uploaded to your WordPress website, chiefly images and documents.
In a brand new WordPress site, it will look bare because there’s nothing in it!
In order to use any files on your site, you need to upload them first.
Let’s take a look at how to do that and how to work with the Media Library.
What you will learn:
- What files can you upload to the Media Library?
- What media can you not upload?
- What size of files are you allowed to upload?
- What is good preparation for uploading image files?
- How do you upload files to the WordPress Media Library?
- How does the Edit Media screen work?
- What are the different views of the Media Library?
- What happens when you upload files to the WordPress Media Library?
- What happens when you upload images to the WordPress Media Library?
- What image sizes does WordPress create?
- What does Organize my uploads into month- and year-based folders mean?
- Can other users see my files in the WordPress Media Library?
- What happens if you upload the same file again?
- What happens when you insert an image into a post or page?
- What do Attached and Unattached mean for media?
- What is an attachment page?
- How do you crop or resize image files in your Media Library?
- How do you delete a file from the Media Library?
What files can you upload to the Media Library?
For most sites you can upload:
- Images, including .jpg, .gif and .png
- Documents, including Word (.docx) and PDF
- Audio *
- Video *
* Audio and video are restricted to WordPress.com’s Premium and Business plans.
Although you can upload video, I don’t recommend it because video files are big.
It’s much better to use a hosted service such as YouTube or Vimeo instead.
If you have self-hosted WordPress (WordPress.org)
File types you can upload on WordPress.org
If you have a WordPress.com site
The list of file types you can upload depends on what plan you are on.
File types you can upload on WordPress.com
What media can you not upload?
There are some file types you can’t upload to WordPress, such as:
- SVG (Scalable Vector Graphics, a type of image file)
- .exe files (program files).
If you try to upload a file type which is disallowed you will see this error:
Sorry, this file type is not permitted for security reasons
What size of files are you allowed to upload?
This depends on your web host. You can see the maximum upload size by going to Media > Add New.
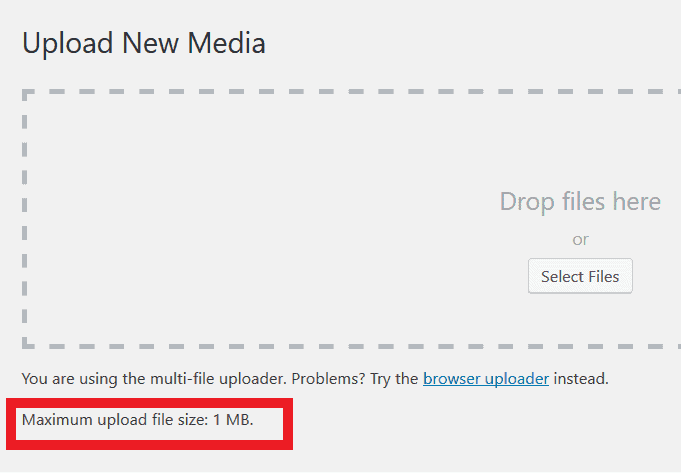
If you upload a file which is too big, you’ll see a message like this:
20180701_145915.jpg exceeds the maximum upload size for this site.
You then have the choice of:
- Compressing the file size and trying to re-upload, if you can.
- Trying to increase the upload limit. You might need to contact your host or network administrator to do this for you.
Remember that large files:
- bloat the size of your website
- are slow to download, frustrating users
- will use more bandwidth, possibly increasing your hosting costs!
What is good preparation for uploading image files?
- Make the filename something descriptive. Which of these filenames do you think would be easier for you to find later? Which do you think search engines prefer?
chicken-tacos.jpgorIMG_0122.jpg?1.jpg, 2.jpg, 3.jpgorholiday-18-beach-ball.jpg, holiday-18-sandcastle.jpg, holiday-18-yacht.jpg?
- Use dashes in filenames in preference to underscores or spaces. Dashes are more cross-platform friendly.
- Do not upload images direct from a camera or phone! Change the file dimensions first. You can use a program online like Pixlr.
- Save the image as web quality.
- Think about how you’d describe the image to a blind person.
To learn more about image file size and dimensions, read How to resize a picture to the correct size.
How do you upload files to the WordPress Media Library?
Drag a file into the pane or click the Select Files button and select an image from a folder of your choice.
You can drag or select multiple files.
After the file has uploaded, click the Edit link to edit the metadata for the file. Metadata is data associated with a file.
How does the Edit Media screen work?
When changing these settings, remember to use the Update button when you have finished to save your changes.
Images
- Post title: this will default to the image filename unless you have set it previously.
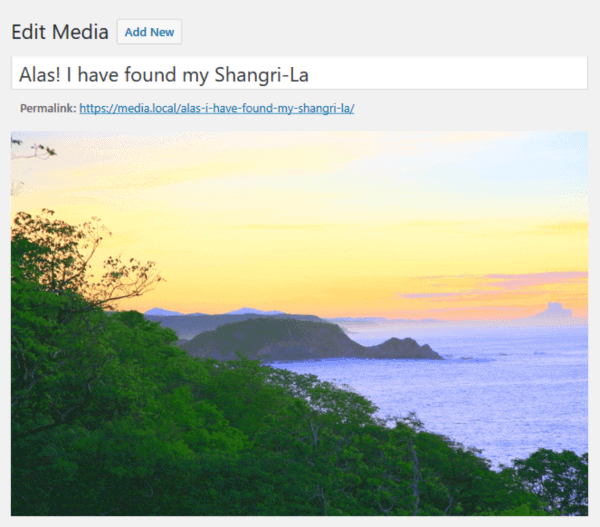
This file has the title Alas! I have found my Shangri-La, which was probably added in an image editing program - Permalink: this is the link to the attachment page (see below).
- Edit Image button: see the section on cropping and resizing below.
- Caption (optional): This is a visible description for the file.
- Alternative Text: This is a description of the image for people with a visual impairment e.g. three tomatoes in a basket. It will only be read out by a screen reader.
- Description (optional): This is a longer description for the file e.g. a complex diagram. It is shown on the attachment page.
Documents
- Post title: defaults to the document filename.
- Permalink: set automatically.
- Caption (optional): See above.
- Description (optional): See above.
Audio files
- Post title: defaults to the audio filename.
- Permalink: set automatically.
- Caption (optional): See above.
- Description (optional): See above.
- Artist: The audio file creator.
- Album: The album if it is part of a collection.
- Featured Image (optional): Select an image which fits the audio.
What are the different views of the Media Library?
There are two: Grid Mode and List Mode. In each view you will see the most recent uploaded files first.
Media Library List Mode
List Mode lists your media in columns. You can reorder some of the columns.
If you click on Name, the files are ordered by A-Z by title. Clicking again reverses the order.
Likewise clicking on the Date column orders by oldest first.
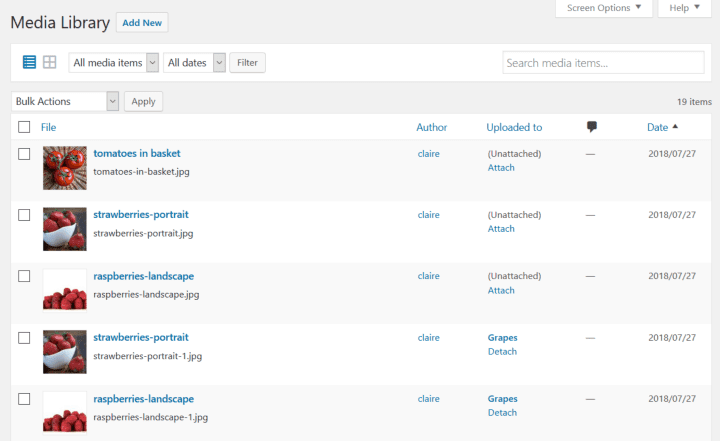
Opening Screen Options in List Mode allows you to show or hide certain columns from the list. If an option is unchecked, you won’t see it. If it’s checked, you will.
The columns you can show or hide are:
- Author
- Uploaded to
- Comments
- Date
You can filter media by type or date, or search by any term. You can even combine filters.
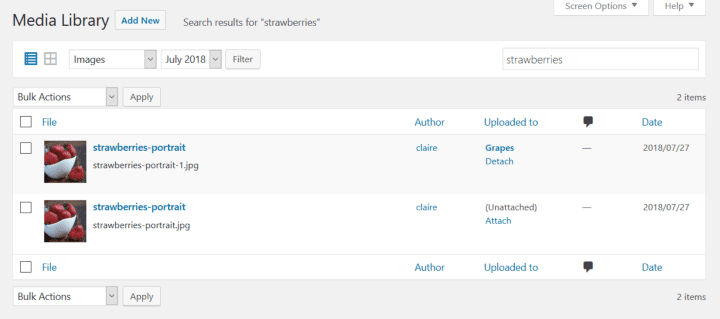
Media Library Grid Mode
Grid Mode shows you thumbnails of your files.

Clicking on a file here will take you to the edit screen. The view is slightly different from the List Mode editing view.
Again you can search or filter files if you want to.
What happens when you upload files to the WordPress Media Library?
When you upload a file, WordPress saves the file into your WordPress install and inserts an entry into your Media Library.
The file is saved in the /wp-content/uploads/ folder on your web server.
The file information is saved as a post type attachment in the WordPress database. WordPress also creates an attachment page for you.
What happens when you upload images to the Media Library?
As well as the steps above, WordPress cleverly creates smaller versions of that image on the fly.
This means for most images you upload you will have four sizes:
- Full size (the image you uploaded)
- Large (created by WordPress)
- Medium (created by WordPress)
- Thumbnail (created by WordPress)
The additional sizes can’t be created any smaller than the dimensions they were uploaded. So if you added, say, a 200 x 200 px image, you would get a thumbnail created, but not the larger sizes.
But you will only see one image entry in the Media Library. The other image sizes aren’t shown, although they exist.
What image sizes does WordPress create?
You’ll find these in Settings > Media. If you can’t see this in the menu, it means that you don’t have administrator access to your site.
These settings are changeable, but the changes will only apply when you save them and next upload an image, not to any previously uploaded images.
The default image sizes are:
Thumbnail
Width 150 px
Height 150px
Hard crop vs soft crop
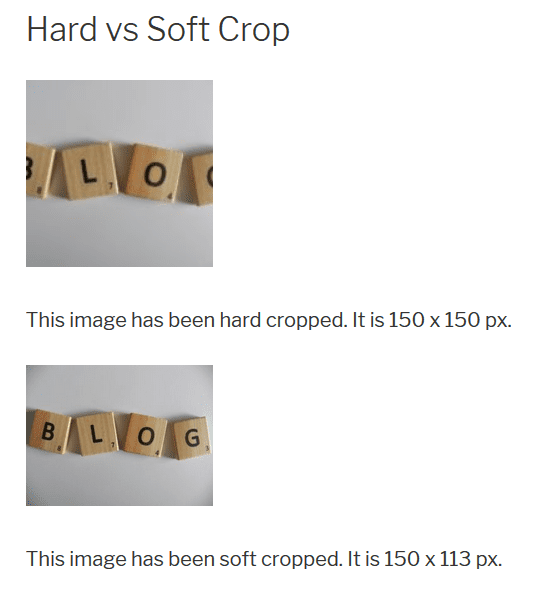
If the Crop thumbnail to exact dimensions (normally thumbnails are proportional) checkbox is checked, you will have square thumbnail images. This is known as a hard crop.
If it is unchecked, your thumbnails will only be square if you uploaded a square image. Otherwise they will be in portrait or landscape format, retaining the proportions of the original image uploaded. This is a soft crop.
The crop type you use can depend on the type of images you upload. Images with wording don’t look so good hard cropped.
Here’s an example.
This is the original image:
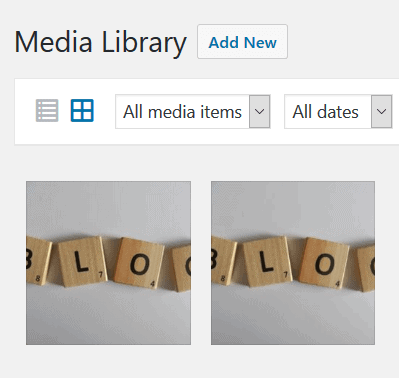
I uploaded it twice, once with hard crop set and again with soft crop.
In the Media Library Grid Mode, you can’t see a difference in the two thumbnails. They both look cropped the same way.
But if you insert them into a post, the difference becomes clear.
Medium size
Max Width 300 px
Max Height 300 px
Max width and max height mean that the width or height of the image will be no more than 300 px, whichever of width or height is the larger.
Large size
Max Width 1024 px
Max Height 1024 px
Additional image sizes
You might have additional image sizes created if your theme supports them.
For example, the Twenty Seventeen theme creates additional image sizes.
- A featured image size of 2000 x 1200 px maximum width and height, hard cropped
- A thumbnail avatar size of 100 x 100 px maximum width and height, hard cropped
The WooCommerce plugin also creates its own image sizes. This is to display products in a store.
What does Organize my uploads into month- and year-based folders mean?
Media is saved by default in the wp-content/uploads/ folder. Having this setting checked means that any files you upload go into subfolders within uploads, e.g.
- 2018/05/ = May 2018
- 2018/06/ = June 2018
- 2018/07/ = July 2018
How does this help? As well as keeping your file system tidy, it means that you can filter the Media Library by month and year. That’s handy if you are looking for a file uploaded at a particular time.
Can other users see my files in the WordPress Media Library?
Yes, anyone who is logged in to your site with a user role of Author or higher can see and use your media files. But only those with Editor or Administrator access can edit or delete them.
What happens if you upload the same file again?
If you upload a file twice the second version will have -1 appended to the filename.
So strawberries-portrait.jpg uploaded again becomes strawberries-portrait-1.jpg.
If you add the same file again it will have -2 on the end, and so on.
Remember that extra image sizes will be generated for your duplicate images, so don’t get in the habit of doing this.
What happens when you insert an image into a post or page?
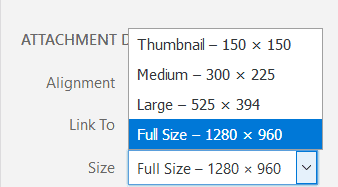
Remember that WordPress saved those other image sizes? When you add an image to a post, one of the things you’ll be asked for is what size you want it to be.
You’ll get a dropdown like this for the image size:
What happens if you have additional file sizes?
Additional image sizes are added to the WordPress filesystem and are used by the theme/plugin that created them where appropriate. But you won’t see these sizes as options if you insert images yourself.
What do Attached and Unattached mean for media?
An attached file is one that you have uploaded to a post or page. In the Media Library List Mode, you’ll see a name in the Uploaded to column.
An unattached file is one which isn’t associated with a post or page. It’s either been uploaded directly to the Media Library or uploaded to a post or page which has since been deleted.
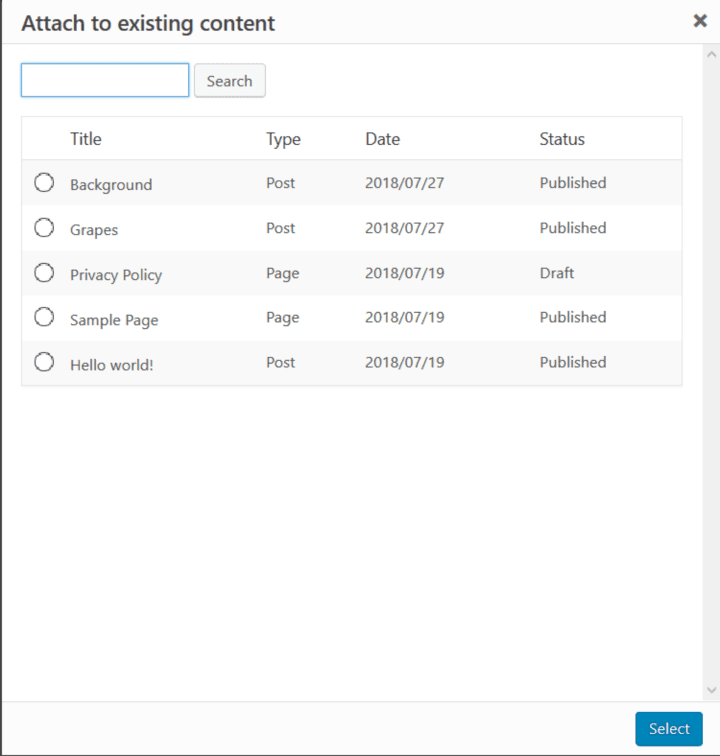
You can attach unattached files by adding them into a post or page, or from the Media Library list view, click Attach for the file and then select the post or page you want to attach it to from the list.
Use the Detach link to detach an attached file from its post or page.
If a file is unattached, it doesn’t mean that it’s not being used somewhere on a site. It might be in your header or footer area, for example. Be careful before you delete it…
What is an attachment page?
An attchment page is an auto-created page that WordPress makes. Attachment pages can show more information about your files and can even invite comments.
To learn more about attachment pages read An Introduction To WordPress Attachment Pages.
How do you crop or resize image files in your Media Library?
WordPress has some basic image editing built in. Before editing, check the Thumbnail Settings.
The tools available are:
Crop
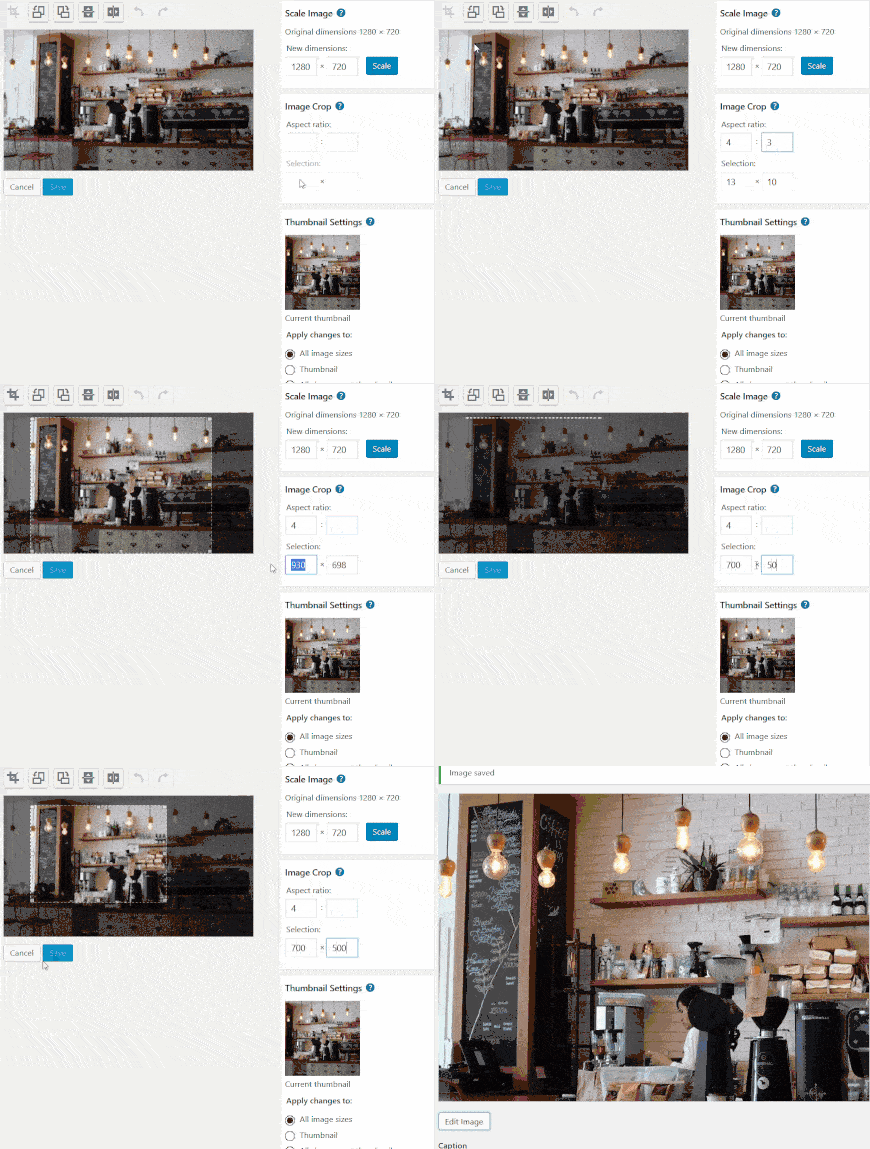
To crop an image, first enter an aspect ratio in the boxes.
Then click and drag on the image. You can adjust the size in the Selection boxes. Press the Crop button when done. Save your changes.
Rotate anticlockwise 90
Rotate clockwise 90
Flip horizontal – turns the image upside down.
Flip vertical – reverses the image.
Scale image – keeps the image proportions.
You can scale down but not up i.e. you can’t make your image larger than it already is.
If you change your mind, there are Undo and Redo buttons.
WordPress doesn’t delete your original image: you can restore it using the Restore Original Image option.
In the Media Library, you can recognise an edited image as the filename has characters appended to it: greengrocer-market-stall.jpg is the original image, and greengrocer-market-stall-e1532728758510.jpg is the edited image name.
If you need more robust image editing, edit your image in another program before uploading or try a plugin like FotoPress.
How do you delete a file from the Media Library?
Delete a file from List Mode view
Find the file, hover over its name and click Delete Permanently.
Then click on OK in the dialog.
Delete a file from Grid Mode view
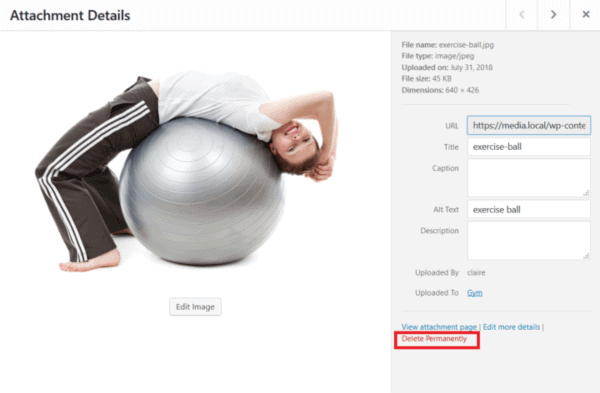
Click on the image you want to delete.
Click on Delete Permanently.
Choose OK in the dialog.
Be careful when deleting media
Unfortunately, there’s no Trash for media library items – once they’re gone, they’re gone. So be sure before deleting a file that you won’t need it again. It helps to have a backup in case you make a mistake.
If you inadvertently delete a file that was in use on your site, you’ll create a broken link.
For images you may see:
- A blank space in the post editor where the image was
- Alt text showing on a post or page where the image was
Here’s a before and after of a post with an image deleted from it.


You’ll need to go into the editor and remove the broken link to clean up.
Find out more about how to deal with broken links.
Do you have any more questions about the Media Library? Why not leave a comment below!



Great post Claire easy to follow and lots of information. I learned a thing too!
Thanks, Shelley.
A very comprehensive and thoroughly informational post, Claire. Definitely worth a good read and a bookmark for future reference.
Thanks, Alice. I’m sure it will be updated!
You might have added that an unattached media file might be listed as such because it is just being used as a ‘featured image’.
Although my images have been adjusted to a small size, they don’t fit the space allotted for them. I think I have cropped them to close. What is the right amount of space to leave around a picture? I have played around with them, and if I leave too much the item in the picture becomes too small. Help!
Hi Andy,
The amount of space to leave round a picture depends on your theme. What theme are you using?